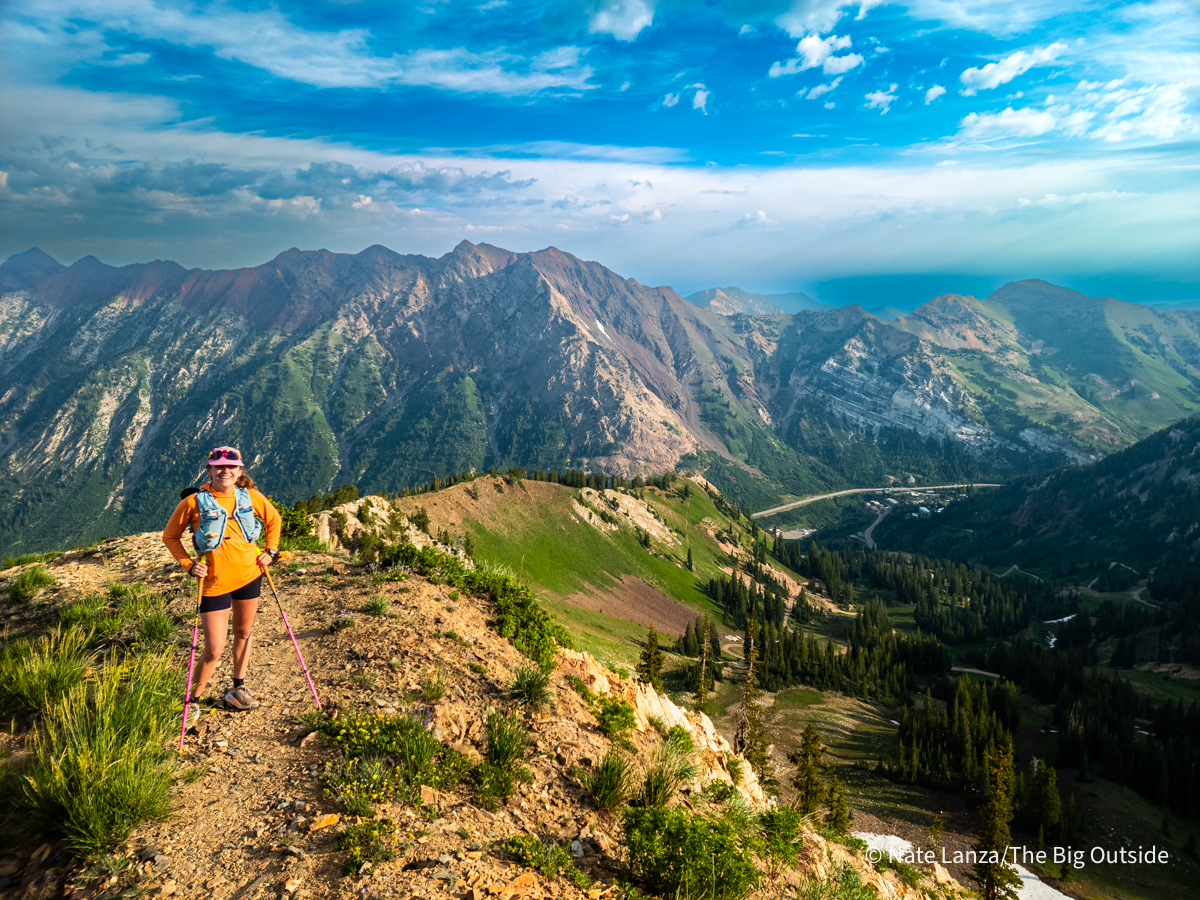
It’s no secret that Salt Lake City offers some of the best and most-accessible hiking of any city in the U.S. Unfortunately, the digital overload from over a million people living next door to the famous Wasatch Mountains spawns “too much information:” Every conceivable route has been posted in countless places, making it easy to end up at the most viral option and hard to figure out which hikes will give you some solitude after a tough day at work, provide the type of challenge that you find worth training for, or definitely make your visiting family or first-time-hiker friend come back for more.
With this assortment of classics and less-well-known gems, I hope to make that decision easier—by providing a manageable number of hikes with a broad range of difficulty levels, popularity, and scenery. I’m confident that anyone will find a hike they’ll love on this list (and probably several).
 Hi, I’m Michael Lanza, creator of The Big Outside. Click here to sign up for my FREE email newsletter. Join The Big Outside to get full access to all of my blog’s stories. Click here for my e-books to classic backpacking trips. Click here to learn how I can help you plan your next trip.

I still remember seeing the Wasatch Range tower over the skyscrapers of downtown as I drove in for my first visit at age 17—a view that catalyzed my decision, in 2019, to move to here for college. Since then, I’ve hiked, run, scrambled, climbed, mountain biked, and backcountry ski toured across every corner of the Salt Lake Wasatch, covering most of the established trail miles (and many unofficial routes) and summiting every named peak over 10,000 feet within Salt Lake County (and then some)—most of them multiple times.
Even after all this time and mileage, and despite having hiked through dozens of national parks and mountain ranges in the U.S. and abroad, I still find myself genuinely awestruck on a weekly basis at the quality of trails and scenery that we have access to within a mere 30 minutes of downtown.
In my explorations, I’ve had the opportunity to see many corners of the Salt Lake Wasatch that most people don’t have the time or knowledge to get to, and from that I’ve gleaned perspective on the places that draw the biggest crowds. You won’t find some of the most internet-popular hikes in the Wasatch on this list—hikes like Donut Falls, an admittedly sick geological feature which otherwise doesn’t offer a whole lot of scenery and is almost always quite crowded—because I think there are similar but better hikes with far less traffic, and you’ll have no trouble finding those viral routes in other sources.
But not here. Instead, this list consists solely of the trails that have become my favorites over many years of obsessively hiking in this range, seeking experiences that pushed my limits, some quick solitude to unwind after work, and chill but spectacular social outings.
Explore the best of the Southwest. See “The 15 Best Hikes in Utah’s National Parks”
and “The 12 Best Backpacking Trips in the Southwest.”

The first several hikes in this story are free for anyone to read, including some of my absolute favorites. But to see all of them—including the least-crowded options, which I run on an almost-weekly basis because of how exceptional they are—you’ll need a subscription to The Big Outside, which costs less (for one month) than a drink or snack you might buy for a friend to thank them for the great hike they just took you on. A subscription also gives you access to hundreds of stories about hiking, backpacking, and more around the U.S. and the world. I provide the two-way distances and elevation gained (which is also the elevation lost, since all the hikes end where they start) for each hike for free; paid subscribers also get access to a map with GPS tracks of every hike (and variation) on this list.
Last but not least, keep in mind that—despite their proximity to a large city—the Wasatch Mountains are still tall, steep, and wild, posing objective dangers that can be hidden behind their popularity and the false sense of security that comes from recreating so close to civilization. Every hike described below can pose avalanche danger anytime there’s snow on the ground. While most people are now aware of the dangers of dehydration in summer—and all of these hikes can get quite hot—less well-known is the often-more-severe condition called hyponatremia, brought on by overconsumption of water without corresponding intake of electrolytes. Bring salty snacks (or better yet, salt pills or tablets) along with your water, and make sure you eat them. I’ve never had any issues with wildlife in the Wasatch, but wary hikers will keep an ear out for rattlesnakes and never approach moose. Cell service is available in much of the Wasatch, but peters out in the deeper side forks of the Cottonwoods; I’ve noted when a hike has a substantial stretch without service.
Many trailheads for these hikes require a parking pass, which is generally $10 for three days, $20 for seven days, or $60 annually. These locations all also accept the America the Beautiful/National Parks Pass, which is $80 annually and worth buying if you also patronize any of Utah’s standout national parks or monuments; purchase from a local Forest Service office in Salt Lake to make sure the proceeds go to improving services and trails in our local mountains.
Find your next adventure in your inbox. Sign up now for my FREE email newsletter.

Cecret Lake and Sugarloaf Mountain
Cecret Lake: 1.6 miles/466 vertical feet
Sugarloaf Mountain: 3.6 miles/1,633 vertical feet
Some trails simply deserve the hype they get, and Cecret Lake certainly does, despite its crowds. At less than a mile to get to the lake (from the upper parking lot), cool mountain temperatures even in the depths of summer, and with plenty of meadows to play in, it’s perfect for young children and families (but note that neither dogs nor swimming in lakes are allowed in Little Cottonwood Canyon). The best times to go for more solitude are early mornings and during school hours on weekdays.
If you’ve got extra juice in your legs, it’s only an extra two miles round-trip and 1,100 vertical feet to get from Cecret Lake to the summit of Sugarloaf Mountain (11,051 feet), the easiest 11,000-foot peak in the Wasatch. For your effort, you’ll be rewarded with expansive views of the tallest peaks in the range and vistas extending in all cardinal directions: to the northern Wasatch near Ogden, Mount Timpanogos to the south, the High Uintas, and over the Salt Lake Valley and Oquirrhs to the ranges of the Great Basin. There are two use trails up to Sugarloaf; one tackles the steep boulder field just left of the peak as viewed from the lake, and will work your legs much harder than the less-steep way that continues uphill to the west of the lake and goes around the backside of the mountain.
Getting to the upper or middle lots (the middle only adds about a half mile of basically-flat hiking) requires paying $12 at the tollbooth for Alta’s Summer Road. I disagree with Alta’s statement that the dirt Summer Road “is not suitable for low-clearance vehicles”; I’ve driven it many times in my low-slung Prius (and seen many other small cars on it) and there’s only a few short, deep dips, which provided no issues, especially when taken at a slight angle—but anxious drivers in small cars may disagree. These lots fill up fast on weekends, forcing you to either wait in line at the toolbooth for vehicles to come down (which can be a while) or park at the large lot just below the booth (never fills up in summer), adding 1.6 miles round-trip and 700 vertical feet to your uphill.
Get the right pack for you. See “The 10 Best Backpacking Packs”
and the “The 10 Best Hiking Daypacks.”

Broads Fork
4.6 miles/2,119 vertical feet
Sister to the incredibly popular Lake Blanche Trail—on which I once counted 230 people in the 2.8 miles jogging downhill from lake to trailhead on a Saturday morning—Broads Fork starts from the same Mill B South trailhead, covers a similar amount of distance and vert, is shadier, and provides an equally impressive alpine view from the meadow at the top—but it sees only a fraction of the traffic (for comparison, I’ve never seen more than a dozen people up Broads). It’s a classic example of viral crowding: two equally gorgeous trails in the same place, one of which gets 10 times more visits than the other (to be fair, Blanche has a lake and Broad’s doesn’t—but I personally still find the experiences equal).
The trail stays mostly in the trees until the top, which makes the contrast of breaking out into the meadow truly breathtaking—from forest to a view of the three sheer, rocky 11,000-foot peaks of the Broads Fork Cirque looming overhead. Intrepid hikers can continue up Broads by crossing the beaver dam at the bottom (northeast corner) of the marshy meadow to access an unofficial use trail, which goes as far as the base of the cirque, where the path peters out into a mess of loose rubble. Doing so offers a more detailed perspective on the peaks directly above and better views looking back at the other side of Big Cottonwood Canyon.
I always make a point to hike Broad’s in May: the massive slabs on the southwest side of the fork release huge avalanches in March and April (good months to not hike above the meadow), stacking the bottom of the drainage uphill of the meadow with rocks and snow chunks that can be as large as refrigerators. A parking pass is required to park at Mill B South (see details above), and this limited trailhead parking fills up fast—but there’s plenty of road parking downhill of the trailhead for when the lot is full. Beware that Broads Fork lacks cell service.
Want more? See “The 25 Best National Park Dayhikes”
and “Extreme Hiking: America’s Best Hard Dayhikes.”

Mount Timpanogos
From Timpooneke Trailhead: 14 miles/4,397 vertical feet
From Aspen Grove Trailhead: 13.7 miles/4,854 vertical feet
The Timpooneke Trailhead for Mount Timpanogos (11,752 feet) sees by far the most visitors of any trailhead in the Wasatch for good reason: It accesses a well-graded, smooth trail that rises through shady, junglesque growth before breaking into high-alpine meadows and eventually achieving the summit of the second-highest peak in the Wasatch Range. But for those seeking thinner crowds or a more challenging trail, Aspen Grove offers a second option to hike Timp. Both exceptional hikes deserve their fame.

The downside of a well-known, high-quality route like Timp comes in the hordes it attracts—driving cars, trucks, and SUVs, wearing all manner of casual, formal, and technical clothing, carrying enough food and water and not. I do not know a time I can recommend hiking the Timpooneke Trail for solitude: if you started up at midnight on a recent Wednesday an hour after I finished, you would not have had the trail to yourself, for there was a group descending well behind me (and I saw 30-50 people after starting around 4 p.m.). Timp is a popular hike in the early morning for sunrise, after work, among those who don’t work, and, of course, on weekends. All that said, the majority of people don’t go to the summit, so you’ll see fewer people the higher you go.
Starting from Aspen Grove often (though not always) yields fewer crowds, but also adds 500 vertical feet of steeper trail. Much of this route also faces south and holds far less vegetation than Timpooneke, so it can feel much hotter on a sunny day.
Along the Timpooneke Trail, water is abundant until Scout Falls, 1.5 miles in; beyond it, there’s no guaranteed water unless you take a detour of up to a mile in the upper Timpanogos Basin to one of the closer unnamed tarns or the farther but reliable Emerald Lake. On the Aspen Grove side, water can be found at a falls 1.1 miles in (this may not flow all season), Hidden Lakes at 4.5 miles, or Emerald Lake at 5.1 miles. Both trailheads require a $10 fee or America the Beautiful pass; Timpooneke also requires a timed parking reservation to park between midnight and noon on Saturdays, Sundays, and holidays between July 12 and October 12. Most of these tickets release 30 days in advance, with a much smaller batch released two days in advance. If either trailhead is full, you might be out of luck: The narrow Alpine Scenic Loop Road that both lie along has very few places to park outside of designated trailheads; this also means that vehicles over 30 feet long are strongly discouraged and towed trailers are prohibited along this byway.
The Big Outside helps you find the best adventures.
Join now for full access to ALL stories, including this one, and get a free e-book!

Mount Olympus
6.8 miles/4,210 vertical feet
An improbable fortress of quartzite slabs visible from anywhere in Salt Lake City, Mount Olympus (9,030 feet) abruptly knifes upward to over 4,000 feet above the surrounding neighborhoods, creating one of the most dramatic peaks in the area—and the trailhead sits only a stone’s throw from the nearest house, making it the most accessible hike on this list.
But this ease of access belies Olympus’s danger: It’s responsible for up to a third of search and rescue callouts in Salt Lake County. Partially, this comes from its popularity—while not the most popular on this list, its visibility and closeness draw plenty of less-experienced hikers—but more so from its cragginess and low elevation, creating potentially-confusing routefinding and extreme heat in summer.

Shade appears rarely on this steep trail until the 2.5-mile mark, at which point you’ve already covered 2,300 feet—well over half—of the elevation gain. Tolcat’s Creek offers water at the 1.9-mile mark, but this can dry up as early as July 1. For slower hikers on the hottest days, eight liters of water or more wouldn’t be unreasonable at all; and of course, you must also bring and eat salt to avoid hyponatremia.
More notorious (though statistically less dangerous) than the heat is the scramble at the top of the trail; about 400 feet of steepness with a couple third-class sections where hand use becomes necessary. Those with experience climbing quartzite should beware that this section has been heavily smoothed compared to natural rock by millions of feet and hands; I’ve unexpectedly slipped quite a few times on this trail. It’s not rock climbing—plenty of people who don’t hit the gym regularly have made it up this—so your odds of success will be determined by your tolerance for heights, not your arm strength. But the treed alpine saddle just below the scramble still provides an outstanding view of the valley and the Wasatch peaks to the south, and yields a worthy hike regardless of whether you summit.
The final challenge of the hike is routefinding, with most errors occurring on the descent just below the summit. After 250 vertical feet of downhill, the trail takes an abrupt right at a small notch in the rock; many people accidentally turn left down a sucker trail that leads to a cliff (and then often a SAR call). Turn around frequently on your way up so that you know what your descent will look like; the trail looks vastly different from above than below. If you find yourself off-route, backtrack to the last bit of obvious trail; the steep section is short, and you won’t have gone far.
I can help you plan the best backpacking or hiking adventure of your life.
Click here now to learn more.

Cardiff Peak, Mount Superior, and Monte Cristo
Cardiff Peak: 2.8 miles/1,618 vertical feet
Mount Superior: 4.5 miles/2,682 vertical feet
Monte Cristo: 5 miles/2,835 vertical feet
The high peaks on the ridgeline between the Cottonwood Canyons—the Cottonwoods Ridge—undeniably provide some of the best views in the range. And the easiest of these peaks to access are Cardiff (10,277 feet), Superior (11,045 feet), and Monte Cristo (11,132 feet), in that order.
From the Flagstaff Trailhead at Alta, a wide but loose trail with little exposure and no technical sections leads to Cardiff Peak, from which you earn a view of most of Little Cottonwood Canyon and Big Cottonwood’s majestic Cardiff Fork—but Mount Superior stands gorgeously and imposingly to the west, blocking the view down both canyons.

Continuing along the ridgeline toward Superior gets you to its summit via a use trail, but it’s a technical one—two highly exposed, third-class sections of scrambling guard the summit from unworthy visitors. These sections aren’t difficult climbing—large blocks provide abundant handholds, and you’re standing, not hanging from your hands, the whole time—but a fall would be life-threatening in many places and the rock is often loose. Plus, the “trail” can be hard to follow on the ascent (it generally stays south of the ridgeline, but close to it), so scrambling skills also come in handy if you get slightly off-route.
The summit of Superior provides a much better view of the canyon, but you’ll also note the slightly higher Monte Cristo just a quarter-mile further west blocking the last of the view. At this point, you may as well continue across this less-technical and short section of ridge to gain the third and highest vantage point, which rewards you with an awe-inducing 360 view of both Cottonwoods and beyond to the Great Salt Lake and, in the other direction, the High Uintas.
No water exists along this hike, and it’s often breezy and cooler than you’d expect on the ridgeline, even in midsummer. I highly recommend wearing approach shoes, which grip rock much better than trail-oriented shoes and are more appropriate for this mostly rocky route.
Like what you’re reading? Sign up now for my FREE email newsletter!

White Pine
10.2 miles/2,744 vertical feet
In all my travels, I’ve seen very few places so close to a busy highway that feel as grand and remote as White Pine Fork of Little Cottonwood Canyon. The wide trail up it (a former forest service road) serves up expansive views down LCC before quickly making its way into a few miles of denser forest, then breaking out into a stunning high-alpine cirque ringed by jagged 10,000- and 11,000-foot peaks. Taking the trail all the way to the top gets you above treeline to the cliff-ringed White Pine Lake, yielding 360-degree views of alpine terrain with not a structure in sight—but you only need to hike about three miles to start seeing alpine views, and you can turn around whenever you wish.
White Pine Trailhead can be incredibly busy, especially on weekends; the few spots in the parking lot fill up quickly (and require paying $10 for a three-day pass or displaying an America the Beautiful pass on your dash), but you can park quite a ways up and down the road as long as you can fit your car fully into the shoulder behind the white line (this doesn’t apply November 1st to May 15th, when the two avalanche zones uphill and downhill of the trailhead close to roadside parking). The trailhead crowds thin out substantially after a short distance; most people only hike about a mile to the diminutive Gloria Falls. There’s no cell service in White Pine; consider carrying a satellite SOS device when hiking solo.
Plan your next great backpacking trip on the Teton Crest Trail, Wonderland Trail,
in Yosemite or other parks using my expert e-books.

Red Pine Lake and Pfeifferhorn
Red Pine Lake: 7.2 miles/2,070 vertical feet
Pfeifferhorn: 10.1 miles/3,820 vertical feet
Equally beautiful twin sister to White Pine, Red Pine Lake provides similar high-alpine views—but with less time required to get to the lake and more tree cover around it. The alpine terrain up here doesn’t sprawl as vastly as White Pine (a much wider fork) but the forest provides a nice contrast, and I’m partial to the Red Pine trail—it’s a favorite of mine for running due to its mostly reasonable grade and usually smooth dirt surface.
Red Pine also offers the option to continue up a very steep use trail to the upper ridgeline; continuing along this ridge eventually leads to the summit of the Pfeifferhorn (11,326 feet), arguably the most dramatic summit in the Wasatch and also one of the tallest. A brief third-class section on the ridgeline provides an exposed but easy challenge; the real danger in ascending Pfeiff comes from occasional crowds on the puckeringly steep face just before the summit, where hikers can easily dislodge rocks onto those below.
Fortunately, Red Pine and Pfeiff only see high usage on weekends (beyond the first mile of trail, which it shares with White Pine and Gloria Falls). I usually don’t run into more than a dozen people on weekdays, making the jog up to Red Pine (and whatever distance I feel like past it) an after-work classic for hikers fit enough to knock it off in a few hours. Continuing past the lake yields progressively better scenery until they become dramatically better as you crest the ridge and gain a view of Box Elder and Timpanogos peaks to the south. Cell service cuts off when you enter Red Pine Fork a couple miles into the hike and reestablishes itself just below this ridgeline.
Read all of this story and ALL stories at The Big Outside,
plus get a FREE e-book. Join now!

Lone Peak
15.5 miles/5,610 vertical feet
Visible from practically the entire Salt Lake Valley, Lone Peak (11,253 feet) rests imposingly along the southern skyline, its west ridge unmistakable as it rises unerringly from the eponymous Point of the Mountain. A truly colossal landform in both height and girth, Lone borders six municipalities across two counties and rises 7,000 feet above the valley floor. Capping this monstrous mound, the Lone Peak Cirque’s 500-foot walls erupt abruptly and perfectly vertically out of the earth, creating a dizzyingly-exposed summit block. Given its size, visibility, scenery, and drama, it’s no wonder that virtually all dedicated Salt Lake hikers eventually set their sights on its pinnacle.
Frankly, the first 4.9 miles and 3,200 feet of the Lone Peak hike—the infamous Jacob’s Ladder Trail—don’t compare to the rest: while still offering stellar views of Timpanogos and Nebo to the south, these steep, switchbacked miles often feel hot and dusty, and scrub oak hangs restrictively over most of the path. But it’s a quick way to gain a lot of elevation, and the top of this section rewards travelers with an exceptional 360 from gorgeous alpine meadows, continuing all the way to the rocky doorstep of the cirque itself. After crossing a small ridge—where a microforest of miniature evergreens clings to a subtle northerly aspect—the trail traverses a rock slab and becomes harder to follow, but a keen eye helps to spot the well-spaced but gargantuan cairns that lead across the half-mile-wide slab. The trail continues to provide periods of mild routefinding difficulty all the way to the summit, as it follows, then exits the creek bed coming out of the cirque to gain an alpine meadow, before pitching straight up through a thin notch to the summit ridge.

A mere 200 horizontal feet before the summit and 40 feet lower, hikers encounter the infamous Lone Peak scramble: a blocky notch with incredible exposure to either side. The climbing here is not hard—I’ve seen a squat, middle-aged man who claimed to do no hiking or exercise on a weekly basis make it across on his own, and I’m sure he’s but one of thousands of similar hikers to have successfully summited—but the 500-plus-foot drop to either side certainly gives many folks valid cause for concern. If this scramble worries you, I recommend going up there and checking it out anyway: You have good odds of being able to make it across, but if you decide to play it safe, the sub-summit before the scramble (again, only 40 feet lower) is no less majestic than the main summit and provides an entirely worthy objective on its own.
If you plan to rely on a GPS track to guide you on the upper mountain, bring a portable charger: There’s a ton of ground to cover via obscure trail, and constantly checking your GPS position eats battery. (Also, make sure you download your map; you can lose service in the cirque.) Water can be obtained from the creek at the base of the cirque (around 6.7 miles and 4,000 vertical feet from the trailhead), but usually dries up in July, at which point this becomes an entirely dry hike.
The trail has very little shade, and the low-elevation bottom gets very hot in mid-summer, so this hike often requires a ton of water. For the hottest days, even fit hikers may require eight liters of water. Start early to do the bottom section in cooler temps, and save some water to drink during the inevitably scorching descent. If you run out on the upper mountain, consider waiting in a shady spot for cooler evening temps before descending; your body uses almost no water to sit in shade, but uses far more to hike as the temperature increases. And on that note, bring a headlamp: This hike can take over 12 hours (my dad and I took just under 10 with a detour on the descent) and can take as long to go down as up; keep an eye on the clock and think about the latest time you can safely get back to your car.
I’ve helped many readers plan unforgettable backpacking and hiking trips.
Want my help with yours? Click here.